
CRC MARKETING HUB
Set Up Your CRC Marketing Hub
Start generating more leads and sales in 8 simple steps
What You Get
Convert more leads into paying clients with done-for-you follow-up sequences that close deals automatically.
Respond faster to capture more leads with SMS, email, and social media messaging from one inbox.
Maximize revenue with a proven sales system that converts prospects into loyal, high-value credit repair clients and reduces cancellations.
Two Ways To Launch Your Marketing Hub
Both options get you live. One gets you there faster.
Self-Setup
Go at your own pace
Follow the step-by-step guide below independently with optional group onboarding calls for additional support and Q&A.
Complete setup at your own pace
Join optional group onboarding calls
Detailed video tutorials for each step.
Quick Launch Program
Launch Your Credit Repair Business in 7 Days — Done With You.
The CRC Quick Launch Program puts a fully-operational credit repair business in your hands in just one week. Our team handles the setup so you can skip the tech headaches and start landing clients. For a one-time $297:
Business Foundation Setup Call — merchant accounts, billing plans, and credit monitoring configured for you
CRC Marketing Hub Activation — social media integration, pre-built workflows, and calendar sync (powered by Go High Level)
Professional One-Page Website Build — custom-built, with Google Business listing and self-service client signup
Business Phone + SMS Setup — phone number configuration and A2P registration
Email + Domain Connection — so your emails don't land in spam
Done-For-You Custom Workflow Buildout — a dedicated hour building your own custom workflows
Marketing Hub Mobile App Setup — run your business from your phone
Post-Launch Readiness Call — we confirm everything's set and you're ready to launch
7-Day Go-Live Guarantee — up and running in a week, guaranteed
BONUS: 6-Week Coaching Program — land your first clients, start making money, start changing lives
Self-Setup Steps
Complete these steps to build your lead-generating sales machine that brings
in prospects 24/7 and converts them into paying credit repair clients.
Step 1: Schedule Your Live Group Onboarding Session
Recommended
Get a guided tour of the hub and a checklist tailored to your goals so you can go live faster.
Align on goals and must-have settings
Prioritize next steps for your use case
Live Q&A with a product specialist
Step 2: Workflows Are Active
The CRC Marketing Hub is working for you behind the scenes right now! If you want to pause your workflows follow steps below:
Quick Setup Guide (5 minutes)
Navigate to Automation: Click Automation from left menu
Select workflow folder: Click "Lead Workflow V2" or desired folder
Open Workflow: Click the name of the desired workflow to launch editor
Toggle on/off workflow: Click the toggle to the desired Draft or Publish mode and save

Step 3: Set-Up Your Profile
Lock in your brand basics so every message and page looks professional and trustworthy
Company name, logo and support email
Business address & time zone
Quick Setup Guide (5 minutes)
Navigate to Business Profile: Log in to your CRC account → Go to Settings → Click on "Business Profile"
Complete Your Business Information: Fill out all required business details including company name, contact information, address, and any other essential profile
fields
Save Your Changes: Review all entered information for accuracy, then click "Update Information" to save your business profile settings
Step 3: Publish Your Pre-Built Workflows
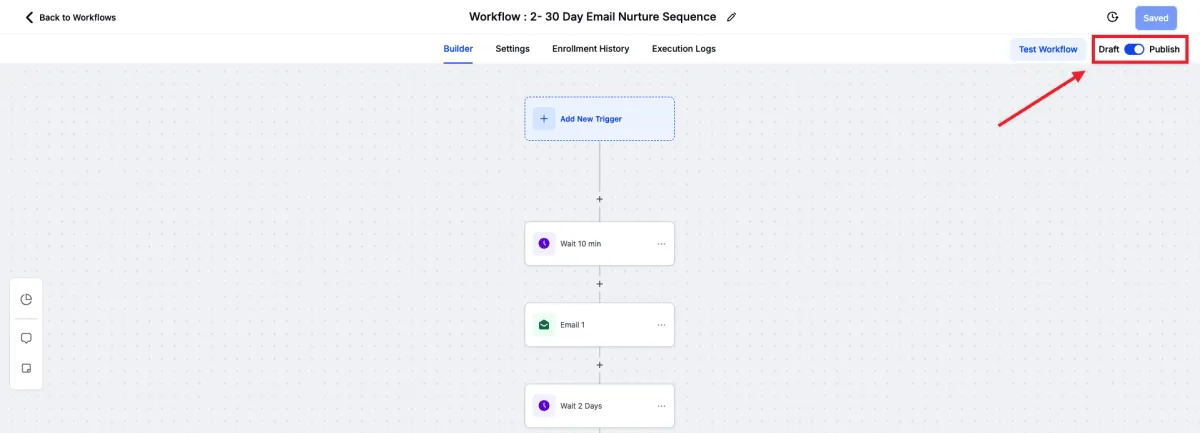
Quick Setup Guide: 5 minutes
Activate Your Workflows: Navigate to your Workflow Builder in "Automations" → Click the "Draft/Publish" toggle in the top-right corner → Switch from "Draft" to "Publish" mode to make your workflows live and functional.
Test Before Publishing: Click "Test Workflow" to run a sample contact through each workflow, then hit "Run Test" to ensure triggers and actions work correctly before going live.
Save and Publish: Click the "Save" button whenever you see unsaved changes (red dot indicator) → Confirm all required fields in triggers and actions are completed → Your published workflows will now automatically process real contacts.
Step 4: Activate Self-Service Sign-Up Flow
Required For Lead Nurturing
Let prospects sign themselves up, capturing details and starting billing on their own, so you convert more with less effort.
Always-on lead capture and sign up
Fewer back-and-forths, faster revenue
Built-in confirmations and follow-ups
Quick Setup Guide (15-20 minutes)
Navigate to Your CRC Account: Log in to your Credit Repair Cloud account → Click on "My Company" → Click on "Self-Service Client Signup Page"
Set Up Your Account: Configure your billing plans (maximum 3 displayed), upload your company logo and profile picture (2MB max file size), customize plan benefits (minimum 3 required per plan), and match billing plans with corresponding client agreements
Get Started with the System: Click "Copy URL" to get your unique signup page link, customize the About section text, enable optional features like 90-Day Money-Back Guarantee or Credit Monitoring Fee display, then click "Publish Changes" to make your page live
Step 5: Connect Your Domain, Phone & Email
Make every link in your email look like it's coming from you, which boosts trust, conversion, and deliverability.
Branded links that look professional in ads and messages
Inbox placement improves when emails come from your domain
Consistent brand across pages, emails, and SMS
Quick Setup Guide (30-45 minutes plus 24-48 hours for domain to propagate)
Email Setup: Go to Settings → Email Services → Create Dedicated Domain to boost deliverability
Phone Numbers: Navigate to Phone Numbers → Add Number → Configure call forwarding settings
Start Communicating: Access contact cards to call, text, or email directly from one unified platform
Step 6: Connect Social Messengers
Turn DMs into deals. Manage Facebook and Instagram messages in one place and never lose a hot conversation.
Reply faster from a single inbox
See chat history next to contact details
Quick Setup Guide (15-20 minutes)
Connect Accounts: Go to Settings → Integrations → Connect Facebook and Instagram accounts
Link Instagram: Ensure Instagram is linked to your Facebook page (Facebook Settings → Linked Accounts → Instagram)
Enable Messaging: Toggle on Messenger and Instagram options, then click "Sync Leads" to import conversations
Step 7: Set Up Calendar
Easily set up a professional calendar that lets clients book 24/7—complete with custom links, reminders, and smart syncing to eliminate no-shows and scheduling chaos.
Booking page with buffers and reminders
Automatic confirmations and reschedule links
All appointments feed your pipeline.
Quick Setup Guide (15-20 minutes)
Create Calendar: Go to Calendars → Calendar Settings → New Calendar → Select Personal Booking type
Set Up Automation: Navigate to Automation → Create Workflow → Use "Appointment Confirmation and Reminder" recipe
Connect Integrations: Return to Calendar Settings → Connections to sync Google/Outlook calendar and video conferencing tools
Step 8: Download the CRC Marketing Hub App
NOTE: Mobile access requires a separate password set-up
Download the Mobile App
Install the CRC Marketing Hub app from the App Store or Google Play

Scan QR Code
Download our app and engage with your leads and clients on the go!

Scan QR Code
Download our app and engage with your leads and clients on the go!
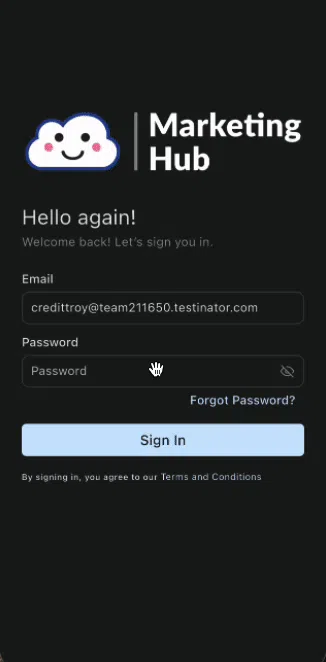
First-Time Mobile App Login (Set/Reset Your Password)
1. Install & open the CRC Marketing Hub mobile app.
2. On the login screen, tap Forgot password.
3. Enter the same email you use for your CRC account and tap Reset password.
4. Open your email inbox from your phone and find the password reset message from [email protected]; tap Reset Password in that email.
5. Create your new password (recommended: match your CRC account password).
6. Return to the app and tap Back to Login.
7. Enter your email and new password, then tap Sign in.
8. When prompted for extra security, tap Continue to get a security code via email.
9. Grab the code from your email and paste it into the app.
10. Tap Verify & Sign in — you’re in.
If you get stuck
No reset email? Check spam/junk, confirm the email address is correct, and try Forgot password again.
Reset link expired? Run the Forgot password flow again to get a fresh link.
No security code email? Recheck spam/junk, wait a moment, then request a new code from the app.
Step 9: Set Up Text Messages
1 to 1 Call Required & Business Documents
Reach leads instantly and keep clients on track with reminders that actually get read. SMS has an average open rate of 98% compared to less than 30% for email
Faster responses than email
Automated reminders reduce no-shows
Two-way texting from your CRM
SMS Setup Process (Two-Step Approach):
Schedule Your Onboarding Call: start with your general onboarding call and get your marketing hub properly configured. This call covers all essential setup steps and ensures you are ready for advanced features like SMS
Receive SMS Setup Invitation: After completing your onboarding call, you'll automatically receive an invitation for SMS specific setup. This ensures you have the foundation in place before adding text messaging capabilities
Have this ready for your SMS setup call:
First Name and Last Name
Business Email and Business Phone Number
Business Address (including City, State, Country, Postal Code)
Website Domain and Domain Host (GoDaddy, Namecheap, etc)
[Recommended] Employment Identification Number (EIN)
NEW Workflows
Now available!
Client Onboarding Campaign
Automatically guide new clients through your onboarding process with personalized email and SMS sequences that send reminders for, Portal log in Document uploads Payment collection to ensure every client completes their setup without manual follow-up from your team.
What's Coming Next
Coming Soon

Score Update Campaign
Automatically notify clients when their credit scores improve by comparing new credit reports and sending personalized updates that celebrate progress, demonstrate value, and turn every score improvement into excitement that reinforces client satisfaction and increases referrals.
Referral & Review Campaigns
Automated campaigns that request reviews at peak satisfaction moments reward clients for referrals and onboard affiliate partners with sequences that help them promote your services effectively. Turning happy customers into your most effective sales team.
How it Works (coming soon)

Complete Setup Walkthrough
A comprehensive overview video that will walk you through the entire CRC Marketing Hub setup process and show you how all the pieces work together to generate leads and grow your credit repair business.
Step-by-step setup instructions
Best practices for lead generation
Tips for maximizing client acquisition